Thursday 29 March 2012

Wonderflex

Sometimes when you're making Cosplay, you just cant get things to be durable enough, sometimes papier mache or foam really doesn't cut it at all. That is where wonderflex comes in. I've always wanted to try it, hearing what other people have achieved with it, durable props and detailed strong but light armour, It is a material that literally stops where your imagination does, no joke.

What is Wonderflex though? Its what is referred to as a heat activated composite material or thermoplastic sheet, a material that when heated up you can shape and form and as it cools it holds that shape and can be reheated many times to get the effect/shape you want. There are many other similar materials that can be used alongside wonderflex such as Fosshape and friendly plastic.

Wonderflex comes in sheets in a variety of sizes, one side of it is smooth, the other has a grid of fibres, be aware of this when making what ever you are making if you're only going to have one side on show and depending on what effect you want, check which side is face up, otherwise you could spend a long time trying to get a smooth surface as other people have found out.

Thanks to Wonderflexworld.com I was able to try out wonderflex for the first time, with my Aion Cosplay well under way and not sure what to make parts out of, when this came to my door unsolvable parts, suddenly became solvable! The collar, Buckles, Cuffs and other smaller details that just didn't seem right being made out of foam. So after doing some research further on the material I set out on my way to start using wonderflex for the first time. Unlike others who had used a heat gun I didn't have this option open to me, so I used hot water from a kettle, which worked just as well, even if i did make a bit of a watery mess in the kitchen the first time around. 

So here are some of my before during and after images of one of the buckles and the collar:


Wonderflex in all its glory just after opening the package. Its easy to draw on with pencil, and cut out with scissors or a craft knife. 


the Buckle all made up, I made a slight mistake when making this but it was easy solvable, I sandwiched foam in between my Wonderflex layers to make it a bit more sturdier and give it a bit more bulk, the middle part is half of a small capsule ball from those vending machines.


The first layer of paint I used normal silver poster paint for this, it worked perfectly fine although it took sometime to dry, but I think that was just me painting it too thickly.


Second layer of paint, some black acrylic painted detail and its also been varnished with clear furniture varnish to finish it off and seal the paint. the capsule has also been painted with acrylic, rivet details were added too before varnishing made form some iron on studs.


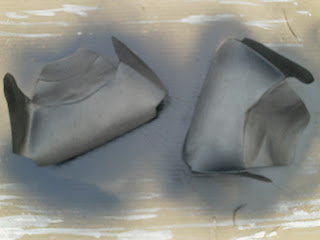
The start of the collar, this is the back section, I spray painted it first for an even black coat before hand painting on the details. There are a few parts to this too, for the details, its a shame you cant see how its formed from this angle I was really chuffed with the forming of this piece when it was finished.


Using a bottle filled with cold water it was easy to form these shoulder collar pieces, and I cannot wait to finish painting them too. the same technique will be used as the other collar part. it took a bit longer to do these parts however looking at it, they are a rather complicated shape.

Wednesday 28 March 2012

Vocaloid Headphones - Part 1

Due to a request I am writing this tutorial about my Vocaloid headphones =) both Magnet and the original headsets. It took me several attempts to find a method I was happy with, and to get results that looked good, so don't get annoyed if it doesn't go right the first time.

Shopping list:

Reference image - Always a good starting point.

Paper/newspaper - For making templates.

Craft foam - you can buy this in lots of colours in most craft stores so there will be no need for painting unless you want a real specific colour.

Glue - Hot glue, UHU or super glue is best as it dries quickest and saves you holding it for too long, remember though hot glue melts plastic!

An old/cheap headset or Alice band - usually depends on which headset you are making but headsets from the pound store make things a little easier.

Wire (Magnet/hairband version only) - Thick Normal metal wire, can buy it off the real in some DIY stores, also available in garden centres.

Coloured wire (Magnet only) - Jewellery making wire. Or as an alternative EL Wire for that extra Computerised Disco glow!

Black lace (Magnet only) - Some nice lace about 1-2cm wide.

Optional:
2x Single LED's - Colour of your choosing

2x Battery clips - 9v battery clips are easiest to get hold of

2x9v batteries - you can get them in pound shops in packs of 2! These are the square ones

2x Resistors - you will need to calculate which ones you will need according to what LED's you buy so make sure you note down appropriate information don't worry there's online tools you can look up that will explain this more =)

Acetate - Colour of your choosing can be found in craft shops or you could use clear plastic from almost any household waste, which you can paint with nail varnish on the inside to colour it if need be.


So lets start with the basic Vocaloid headphones. First you need to put the hairband or the headset on your head, make sure its comfortable. If a headband mark where the top of your ears are. If a headset adjust it so its comfortable. then take it off again, this is important as you don't want to stick anything to the headset/hairband in the wrong place. Next get some paper, you want to draw templates to make sure all parts are the same size. Draw the Basic rectangular D shape onto the paper like in the images above until you're happy with it. Cut it out and draw it 4 times on your foam (colour choice is yours however if Miku/Mikou its black, Rin and Len its white and Luka is gold - always check your references). Hold the template up to your head before cutting out, make sure its the right size you want, if not adjust according to what you want.

Decision time, My Luka and Miku headsets patterns on the outside were made differently. my Miku headset I cut out the foam shapes and stuck onto the D shapes, my Luka headset I cut the foam out and stuck another piece underneath to make the 3D texture. The reason I chose to do Luka differently was Due to the LED's  you need to cut out a D shape at the front of 2 of your rectangular D shapes and then attach your coloured plastic at the back, this is to allow the light to shine through.

(I hope this makes sense so far)

Next you will need to measure around the edge of your D shapes (only 2 for now), you will need 2 thin strips of foam in the same colour this length around about 1.5cm wide. This strip you glue to the INSIDE edge of the rectangle D, so when viewing from the sides you don't see any joins.  

If you're using a headset you will need to put on the headset again, slide your left over D shape underneath the earpiece and put it where it feels fits best to your head. Draw around the headset earpiece on the D shape. Do this for both sides, and then cut it out. Also get the D shape you've been gluing together and put it against the ear with the Mic, mark where the mic is, you will need a hole for it to come through, otherwise it wont sit right. Now sandwich the headset inside the 2 D shapes on each side, and you're pretty much done, If you are using electronics make sure you solder them together and put them inside before gluing it all together, and not to forget leave a bit more of a bigger hole to allow access to the batteries.

If only using a headband you can skip straight to gluing it all together, again unless needing holes for the electronics to sit in =)

To make a mic if you are using a hairband Just cut off a desired length of wire and push it into your Solid D shape. Then cut out 2 small rectangles of the same colour as the main body of the headset and glue it to the end of the wire. (one piece each side) once dried on the inside add 2 black pen mark lines, and you're done! if youre worried about the wire falling out you can glue it in place.

If you're making Lukas headset, I made the headband part from the same 2 layers of foam, as i did the inverted details and glued that onto the headset/hairband first, as to hide joins underneath the ear pieces. 

Ok that's it for part 1! Part 2 shall be circuits and Magnet headsets =) hope this helped.

Edit: Below are some progress pictures from my Luka headset.


Tuesday 27 March 2012

Bones

Ever since I first made my Necromancer Cosplay people keep asking how I made the bones, It's no secret in fact I used the same technique a few of my friends use to make Quad and fur suits with a twist. There were several techniques i could have used to make them, but thinking about convention/event safety rules I opted to make them out of upholstery foam, Yes the same stuff you have inside the sofa! A simple template of the rough shape drawn onto a square of the foam, using a pair of scissors cut and shaped until i was happy, after that it was patients to papier mache each individual one before painting as desired, yup that simple =) and it didn't hurt me or anyone else if they ran/ bumped into me. I had a few issues with this technique and probably wouldn't advise it for huge bones, but if you're maybe looking for some lightweight horns for a wig, this might be ideal =) I think I may try it in the future again if I attempt a Draenei


Of course the foam bones weren't the only bones I had on the costume, there was also the necklace which after browsing the internet and hearing about friends jewellery they had made for their costumes I opted to use Fimo, and I can recommend it to anyone, I love it! Its so easy to use can't wait to have a project where I need to use it again.

Monday 26 March 2012

The First

First posts are always scary, I never know what to write. I guess an introduction is in order. Fantail Cosplay, is but a name, a stand alone cosplayer who needs a place to post up progress pics, and write about goings on for myself and for friends as its starting to take over my Facebook, and I feel Cosplayisland is a place I don't go into depth enough, plus I cannot write things there like I can here, where i can post links, images, tutorials I'm following, where i bought materials. also a place to list things to help friends when i find them or come across things. I have tried to make scrap books before, they work for a short time, but after a while I either fill the book, loose it or forget about it (that and others cant read it).

So here's to a new start! I hope this helps people, and unclog my Facebook haha. This will be run alongside my  new website Fantail creative, my DeviantART account and of course my Cosplayisland =) so hopefully all will tie in together here!

Posts will be made as I make progress, whether it be just a single photo, a short bit of text, or a wall of rant from how things are going so badly, though I hope that wont happen too much. So until the next post, here's a picture of what I am currently working on, and a Link to my Cosplayisland where you can see some of the current progress pictures. http://www.cosplayisland.co.uk/costume/view/46279